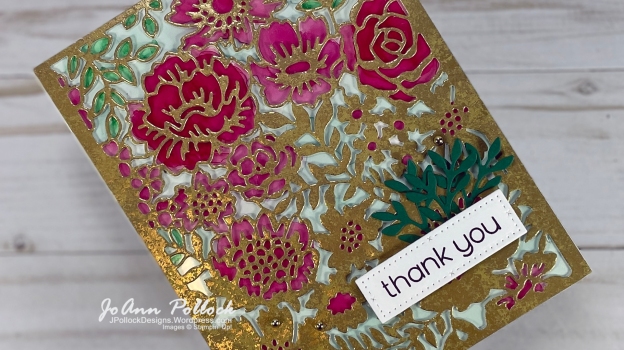
Welcome to the March Technique Squad Blog Hop! This month’s theme is the Stained Glass technique, which can be done using a variety of methods. For my project, I chose to use a window sheet and a background die.
To start, I added an adhesive sheet to the back of my 4 1/4″ x 5 1/2″ piece of Distressed Gold paper. Then, I used the background die from Two-Tone Flora dies and ran it through multiple times to ensure all the fine details were cut through. Since I had already put the adhesive on before die cutting, adding it to a window sheet was easy.
I colored in the flowers and leaves on the BACK of the window sheet using Blackberry Bliss, & Shaded Spruce Spampin’ Blends alcohol markers and filled in the rest using Lost Lagoon. The flowers look darker and lighter depending on how often I colored the area with my marker. I added two basic white die cuts behind the window sheet to give the card a little dimension.
I added the panel to a thick white card base and used the Timeless Arrangement stamps and dies for the sentiment and die cuts.
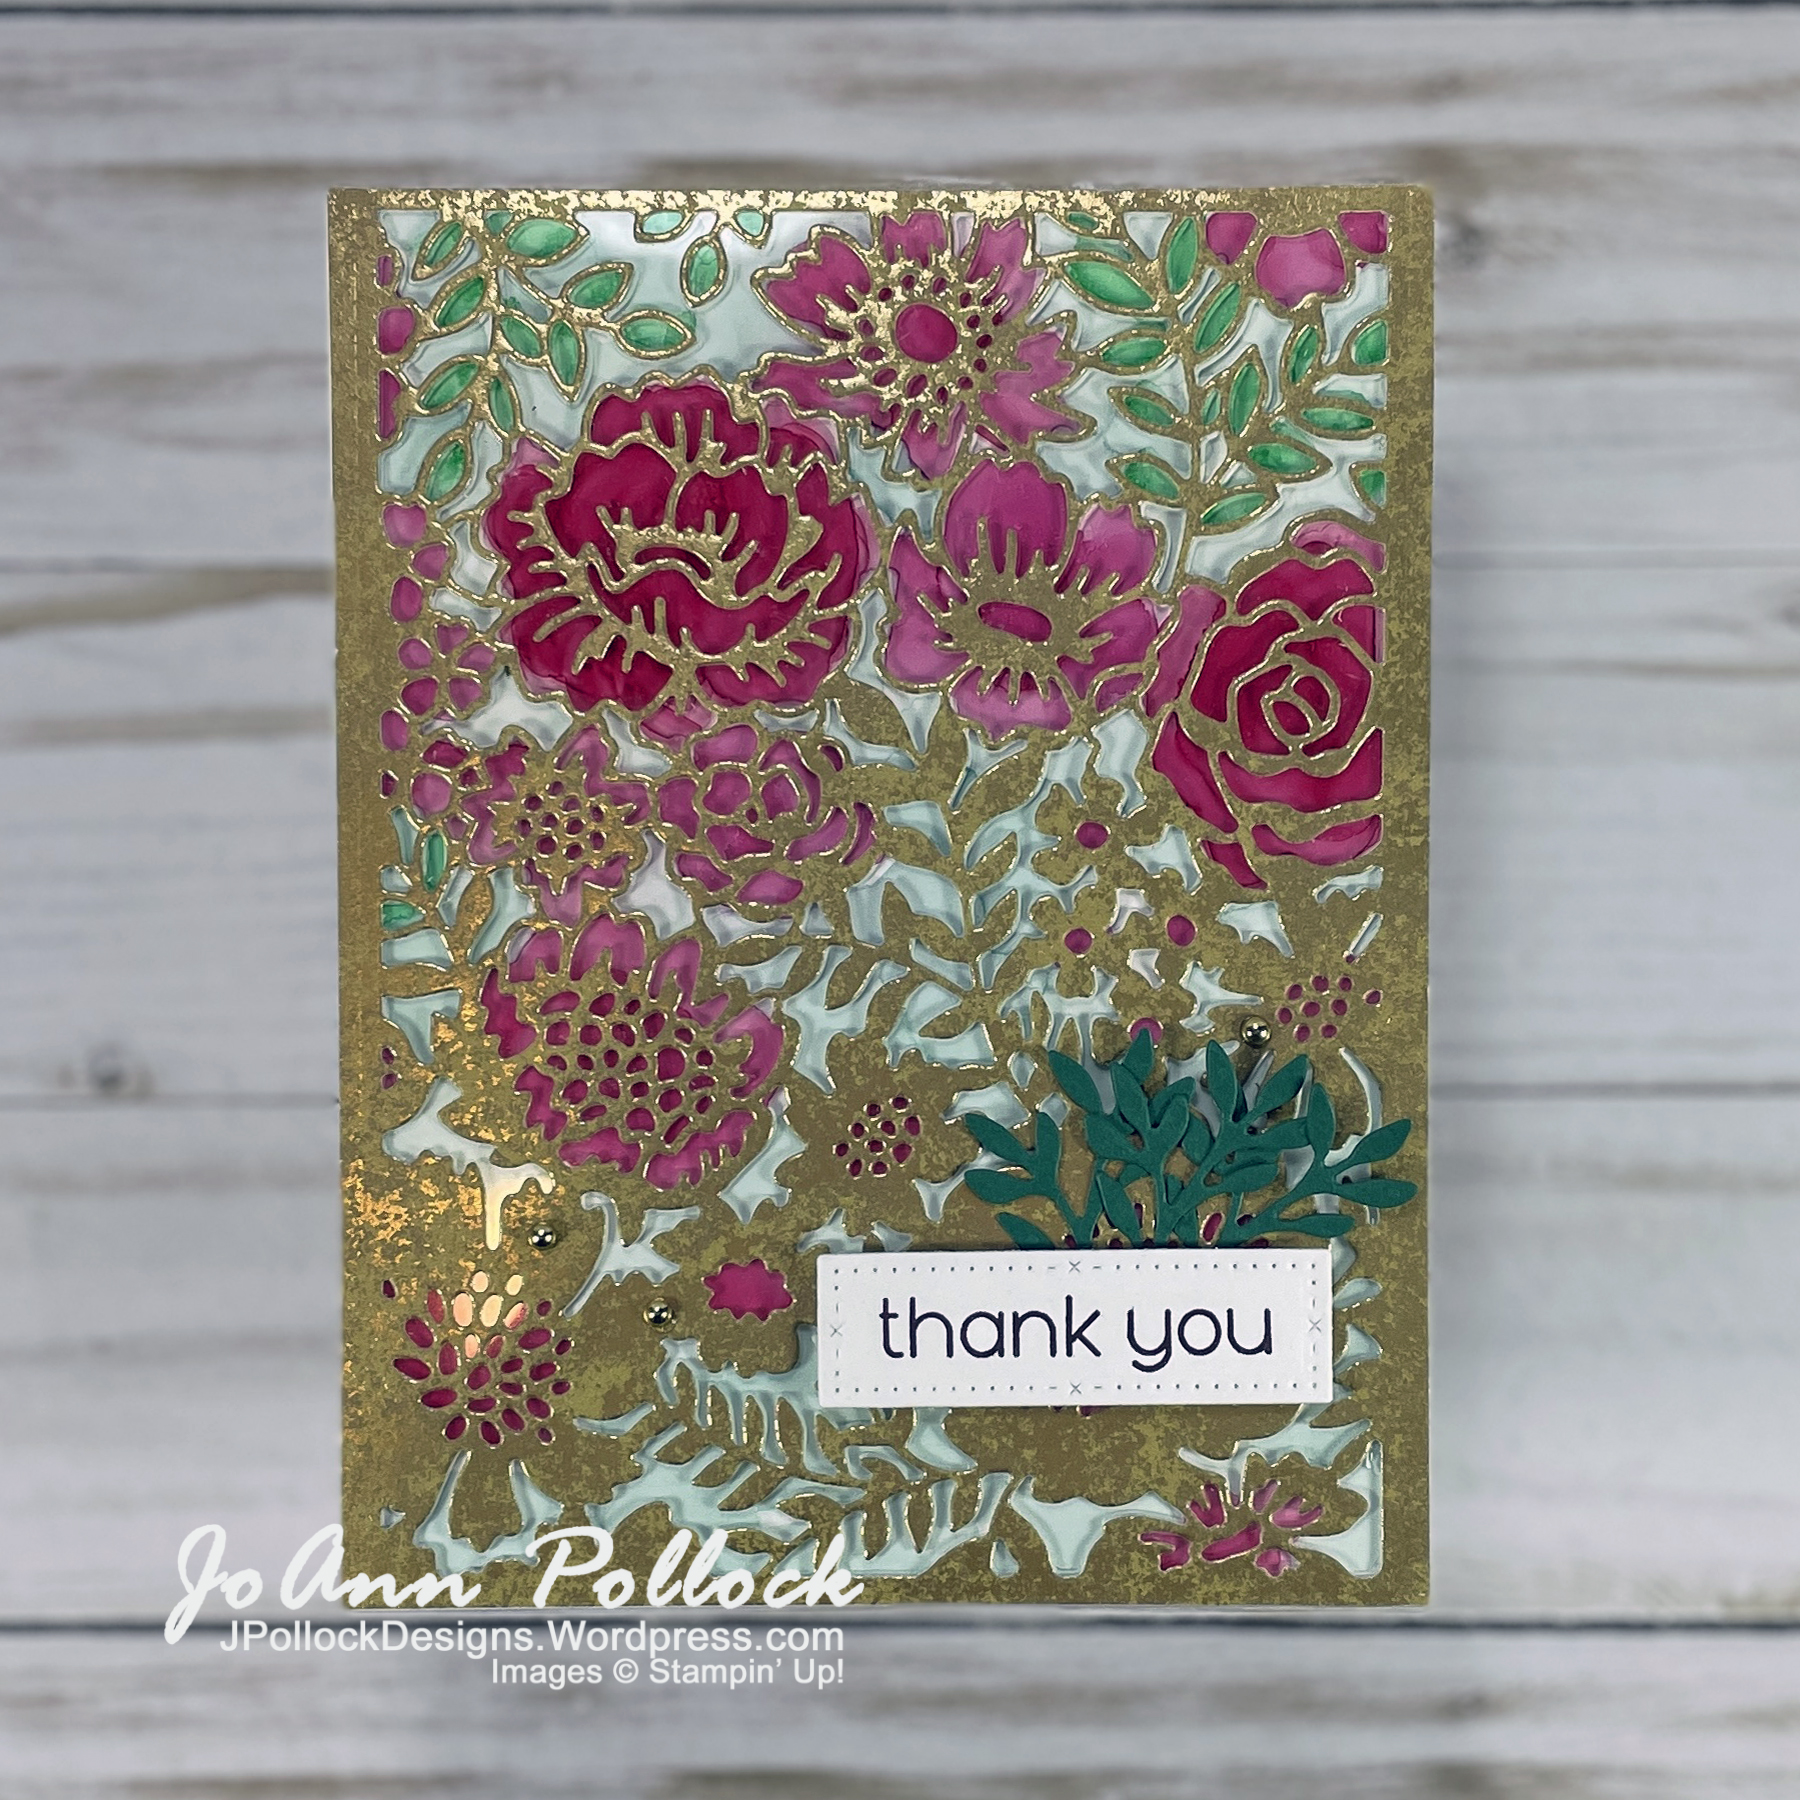
I created several birthday cards using the March 2024 Sheetload of Cards. I hadn’t used the Countryside Inn patterned paper in a while, so I decided to pull it out for today’s cards. To complete the look, I added a flower from the Two-Tone Flora stamps & dies and some cork rounds.
This month, the Technique Squad Blog Hop group is featuring the Telescoping Technique. When I looked up this technique, I found two different versions. The first one involves layering an image to make it pop out from the card, and the second one involves having layers twist apart. I decided to try the twist-apart card since I’ve never done it before. I really like how this card turned out and I see a potential for a snowman card if we only had some snow this winter.
I started by selecting the sentiment for the inside of my card, because what’s better for this type of card than a message that includes stretching? Next, I chose my Deckled Circle dies, making sure to select a size that would fit into a standard A2 envelope. For each layer, I skipped one die and chose the next size. The most challenging part was deciding which patterned paper to use and aligning the brads. Please forgive me if it’s not perfectly straight. My brads are probably 15-20 years old and I don’t even know when I last used one.
I used Berry Burst, Bubble Bath, and the Two-Tone Flora stamp set to create the flowers on the top layer. I had forgotten about this stamp set, but the flowers are so pretty.
This month’s technique is generational or second generation stamping. The technique has been around for more years than I can remember but sometimes it’s fun to pull it out again.
For my second generation stamping, I stamped the leaves on the background first on the left and then twice more to the right without re-inking. I like how it fills the area in. The stamping was more visible before I embossed the background but it was just too white with the embossing for me.
I also found a new favorite color combination for flowers. I’m loving the Bubble Bath & Cajun Craze combo! I pull it right out of the pattened paper I used.
Supplies: Stamp Sets – Layering Leaves, Two-Tone Flora Die Cutting & Embossing – Two-Tone Flora dies; Countryside Blossoms embossing folder Ink – Bubble Bath, Cajun Craze, Old Olive, & Tuxedo Black Memento stamp pads Paper – Delightfully Eclectic 12″x12″ Designer Series Paper; Basic White, Basic White Thick, & Old Olive cardstock Accents & Embellishments – Classic Matte dots Tools – Paper Trimmer, Simply Scored, Bone Folder, Stampin’ Cut & Emboss Machine, Take Your Pick Adhesive – Stampin’ SEAL, liquid glue
Today we are doing the Bokeh technique on our blog hop. It’s been many years since I’ve done the Bokeh technique but I was excited to try it again.
I started with a piece of basic white cardstock cut to 4″ x 5 1/4″. Using a blending brush with my Balmy Blue stamp pad, I covered the cardstock. I chose to do it this way because I’m horrible at good blotchy. 🙂 Then I pulled in Night of Navy and used my blending brush to color in some of the areas. All of this was just to get to the point of doing the technique. 🙂
Now you want to make sure your background is completely dry or your sponge dauber and white stamp pad will end up with colors other than white in it. (Ask me how I know.)
I made two stencils for this technique, one with the Stylish Shapes circles and the other with the retiring Layering Circles dies. For each, I needed to use my precision base plate to get through the window sheet so if you don’t have one of those try a cardstock shim. Use a variety of circle sizes to create your stencil. (For the Stylish Shapes circles, you may want to dab the white ink around the circles on scrap paper first to fill in the stitching or it may transfer to your project where you don’t want it.)
Now we finally get to the technique. Pick a spot on your, pick a circle size, lay it on the background, and dab white ink on the background with a sponge dauber. Continue to do this in various places in the background. Personally, I like to overlap a few of the circles.
Sadly, it’s just me this month but I hope you enjoyed my card and video.
In case you wanted to see my first card from years ago, I found it. I can tell you that it’s using Perfect Plum and the Another Thank You stamp set but I have no idea what color that green is.
Supplies: Stamp Sets – Go To Greetings, Two-Tone Flora Die Cutting & Embossing – Layering Circles, Stylish Shapes, Tailor Made Tags, & Two-Tone Flora dies Ink – Balmy Blue, Garden Green, Night of Navy, & Whisper White stamp pads Paper – Basic White, Basic White Thick, & Night of Navy cardstock; Silver Foil Specialty Pack; Window Sheets Accents & Embellishments – Balmy Blue Double-Stitched ribbon, linen thread Coloring Tools – Blending Brushes, Sponge Daubers Tools – Paper Trimmer, Simply Scored, Bone Folder, Stampin’ Cut & Emboss Machine, Heat tool Adhesive – Stampin’ SEAL, Stampin’ Dimensionals, liquid glue
This month the Technique Squad Blog Hop theme is Pop-Out Window Card (also known as a Lever Card). I made this card once before a few years ago (check it out here) and demonstrated it at an event known as Demos Galore. That card was an offset window and I started my process using my instructions for it. My process resulted in a few different versions and I’m going to show you all of them.
The first card I’m going to show you is actually the last card I made. I wanted to create a video and this one seems the easiest to do that with and it was the one where I laneded on the inside panel dimensions I liked best. The inside is a piece of 5 1/4″ x 6 3/4″ cardstock, scored at 1/2″, 2 5/8″, & 4 3/4″.
The Sea Turtle card is actually the first one I created using the specific directions from my previously mentioned card. Since I no longer have the paper for that card and pretty much everything else I used on that card is retired, I made it using the Sea Turtle stamp set.
I didn’t get my hearts lined up exactly right, so I thought I would use one of the Something Fancy dies and the Two-Tone Flora to make another version. I may have gone overboard with the flowers on the inside. 🙂
For my last “practice” card, I used the inside dimensions from a Jennifer McGuire video but added the 1/2″ on the left for attaching the inside panel. This inside panel is 5 1/4″ x 6 3/8″ scored at 1/2″, 1 1/2″, & 4 1/2″. I wasn’t thrilled that the inside couldn’t lay flat which is how I came up with the inside of the first card I showed.
Susan Campfield challenged her team to create different Pop Out Slider cards based on this fun fold she recently shared. Here is my version. For instructions on how to make it you can visit her blog here. I did make a couple of changes. I decided I wanted the pop out feature on the left side of the card so I could easily write on the white panel, and I didn’t put the extra patterned paper around the mechanism.
I designed this card for my class this past Saturday because, unfortunately, I needed a sympathy card.
I’m still in love with the Favored Flowers Sale-a-bration Designer Series Paper and my favorite thing to do is pair it with the Two-Tone Flora stamp set. (The paper actually coordinates with the Fragrant Flowers bundle but I don’t have that one yet.) I also pulled out the Fine Shimmer paper to add a little bit of shimmer to the card.
Measurements:
Blackberry Bliss cardstock
5 ½” x 8 ½”, scored at 4 ¼”; 1 ½” x 4”
Basic White Thick cardstock
2 ½” x 2 ½”
Fresh Freesia cardstock
1 ¾” x 3”
Evening Evergreen cardstock
1” x 2 1/2”
Fine Shimmer paper
1 ¾” x 4”
Designer Series Paper
4” x 5 ¼”
Instructions:
Using Blackberry Bliss, stamp the top layer of the flower. Using Fresh Freesia, line up the background layer of the flower and stamp. (I set this up with my Stamparatus.) Die cut the flower.
Using Blackberry Bliss, stamp the sentiment on Fresh Freesia cardstock then die cut.
Using Evening Evergreen, stamp the leaves twice on the Evening Evergreen cardstock. Die cut the leaves.
Emboss the small piece of Blackberry Bliss cardstock, adhere to the Fine shimmer paper. Take care to line up the ends of the paper. Adhere to the patterned paper and cut off any excess. Adhere patterned paper to the cardbase.
Using mini glue dots or liquid glue, adhere leaves behind the flower die cut.
Using Stampin’ Dimensionals, adhere sentiment to the right of the embossed piece. Adhere flower to the left of the embossed piece overlapping the label.
Scatter a few Pastel Pearls around.
Supplies: Stamp Sets – Something Fancy, Two-Tone Flora Die Cutting & Embossing – Something Fancy & Two-Tone Flora dies; Cane Weave 3D embossing folder Ink – Blackberry Bliss, Evening Evergreen, & Fresh Freesia stamp pads Paper – Basic White Thick, Blackberry Bliss, Evening Evergreen, & Fresh Freesia cardstock; Favored Flowers 12″x12″ Designer Series Paper; Fine Shimmer 12″x12″ paper pack Accents & Embellishments – Pastel Pearls Tools – Paper Trimmer, Simply Scored, Bone Folder, Stamparatus, Stampin’ Cut & Emboss Machine, Take Your Pick Adhesive – Stampin’ SEAL, Stampin’ Dimensionals, liquid glue, mini glue dots