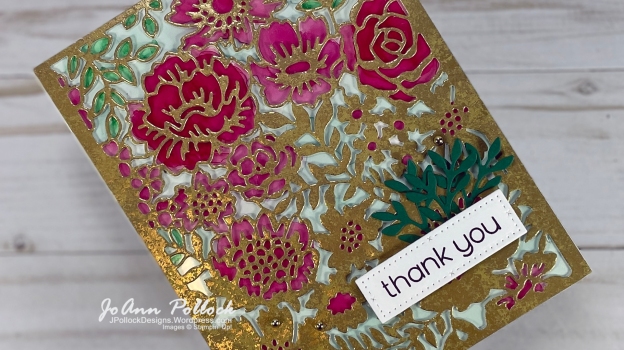

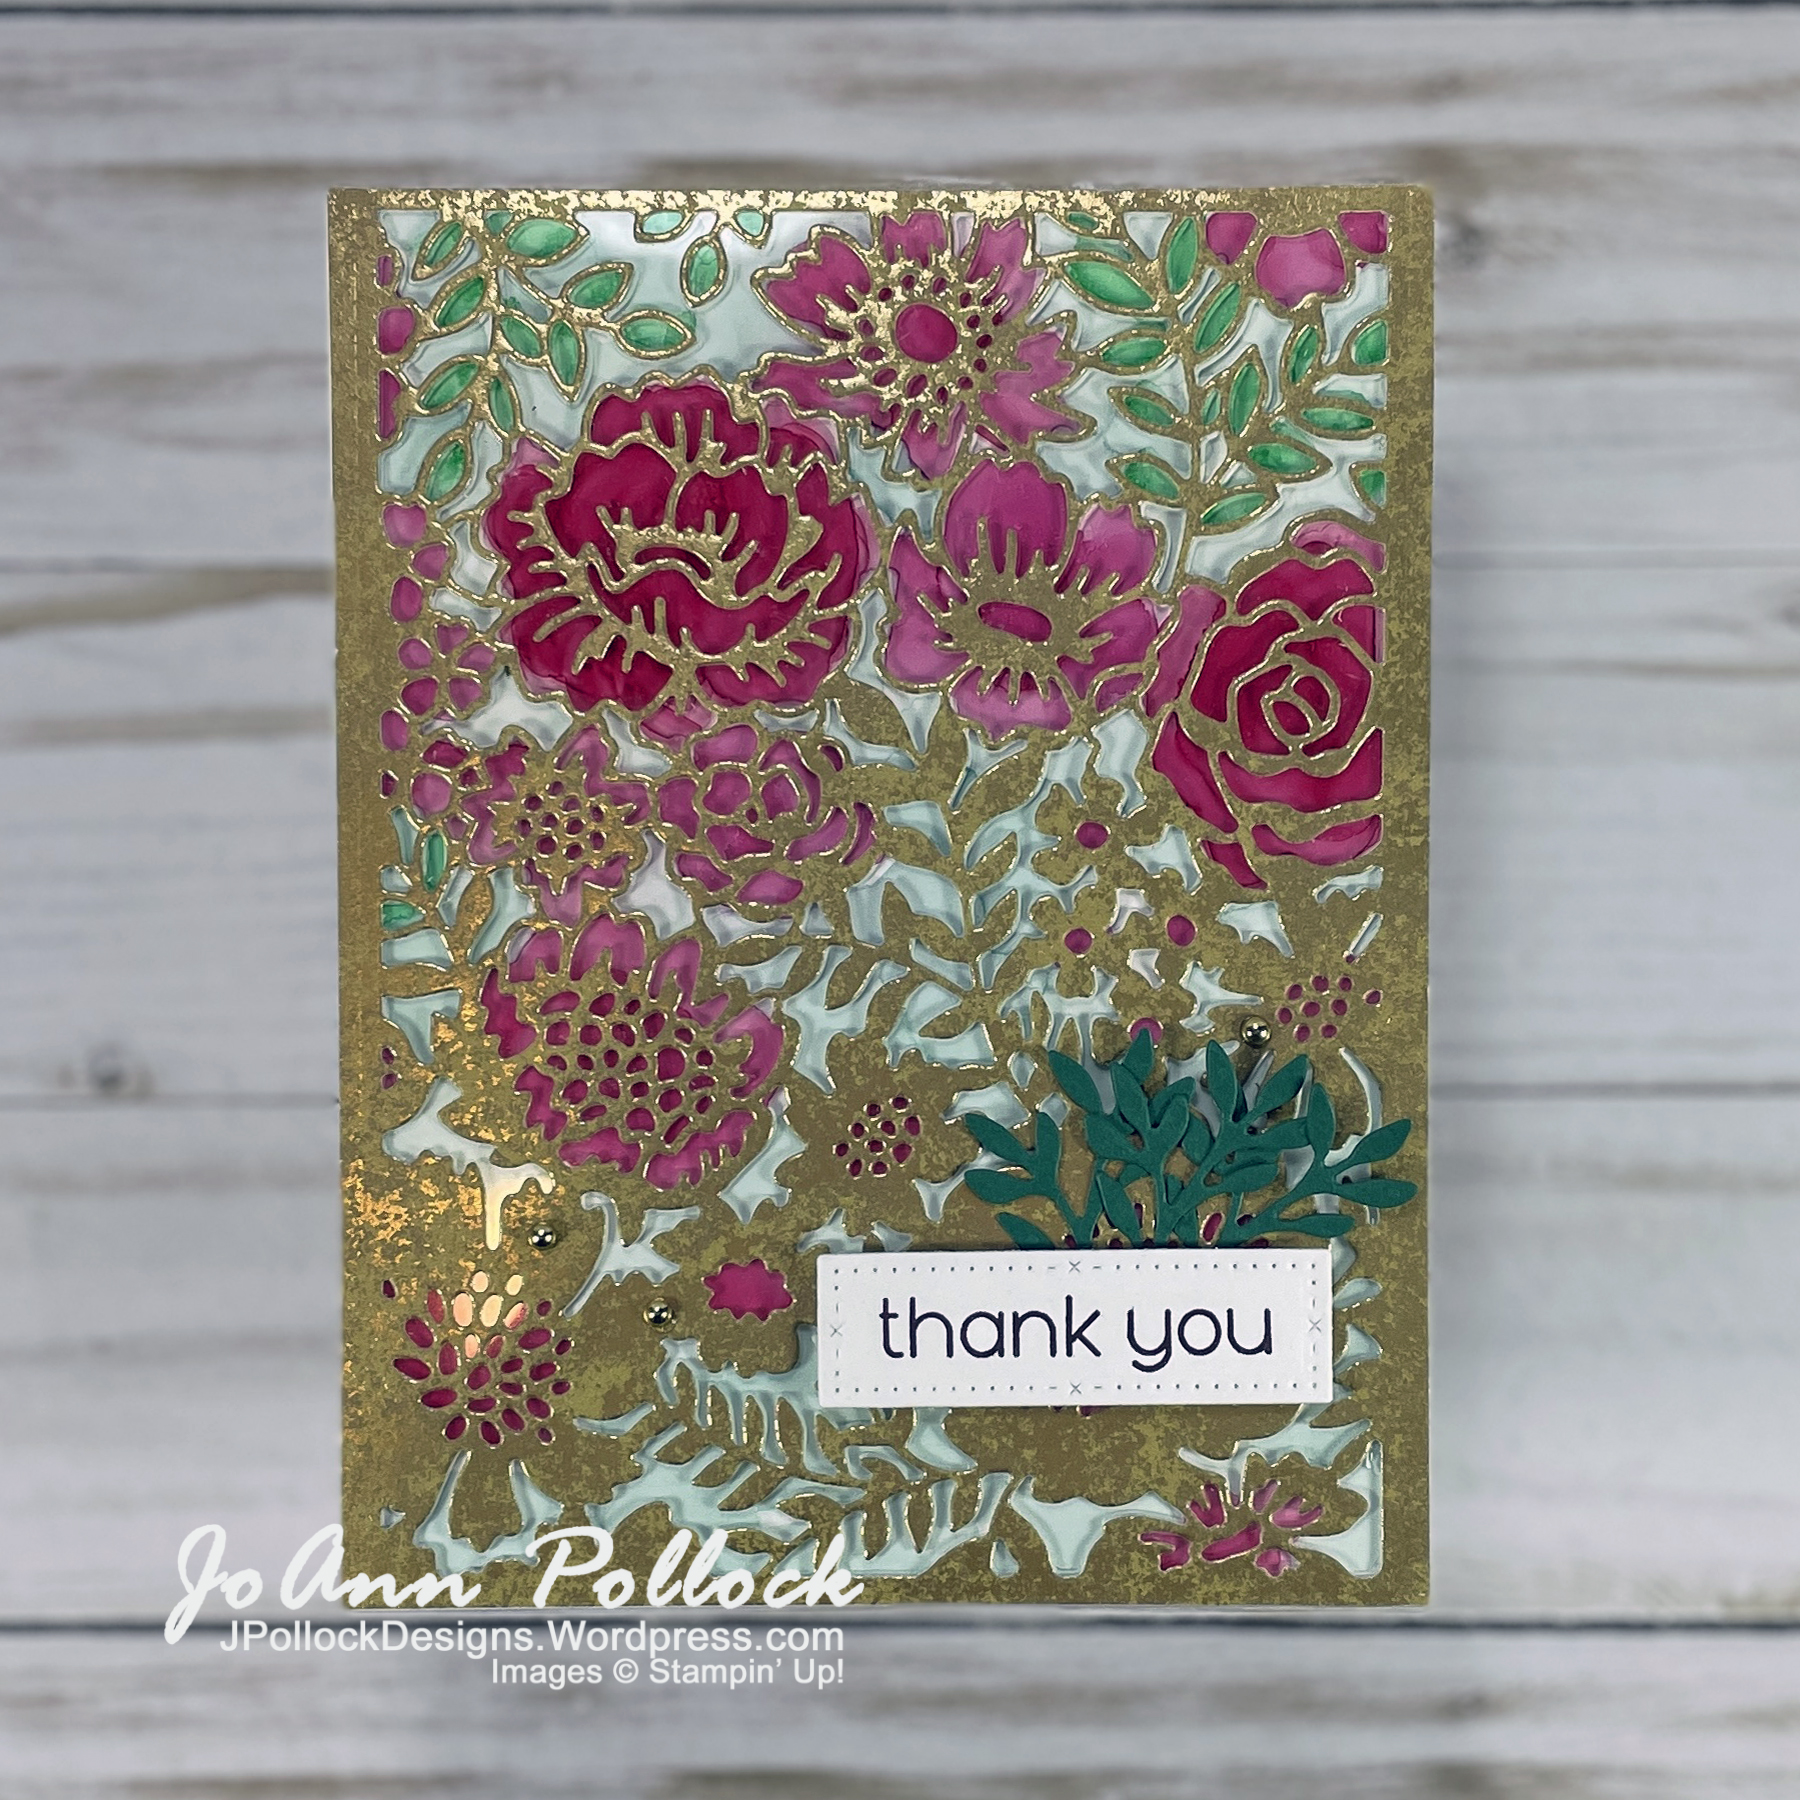
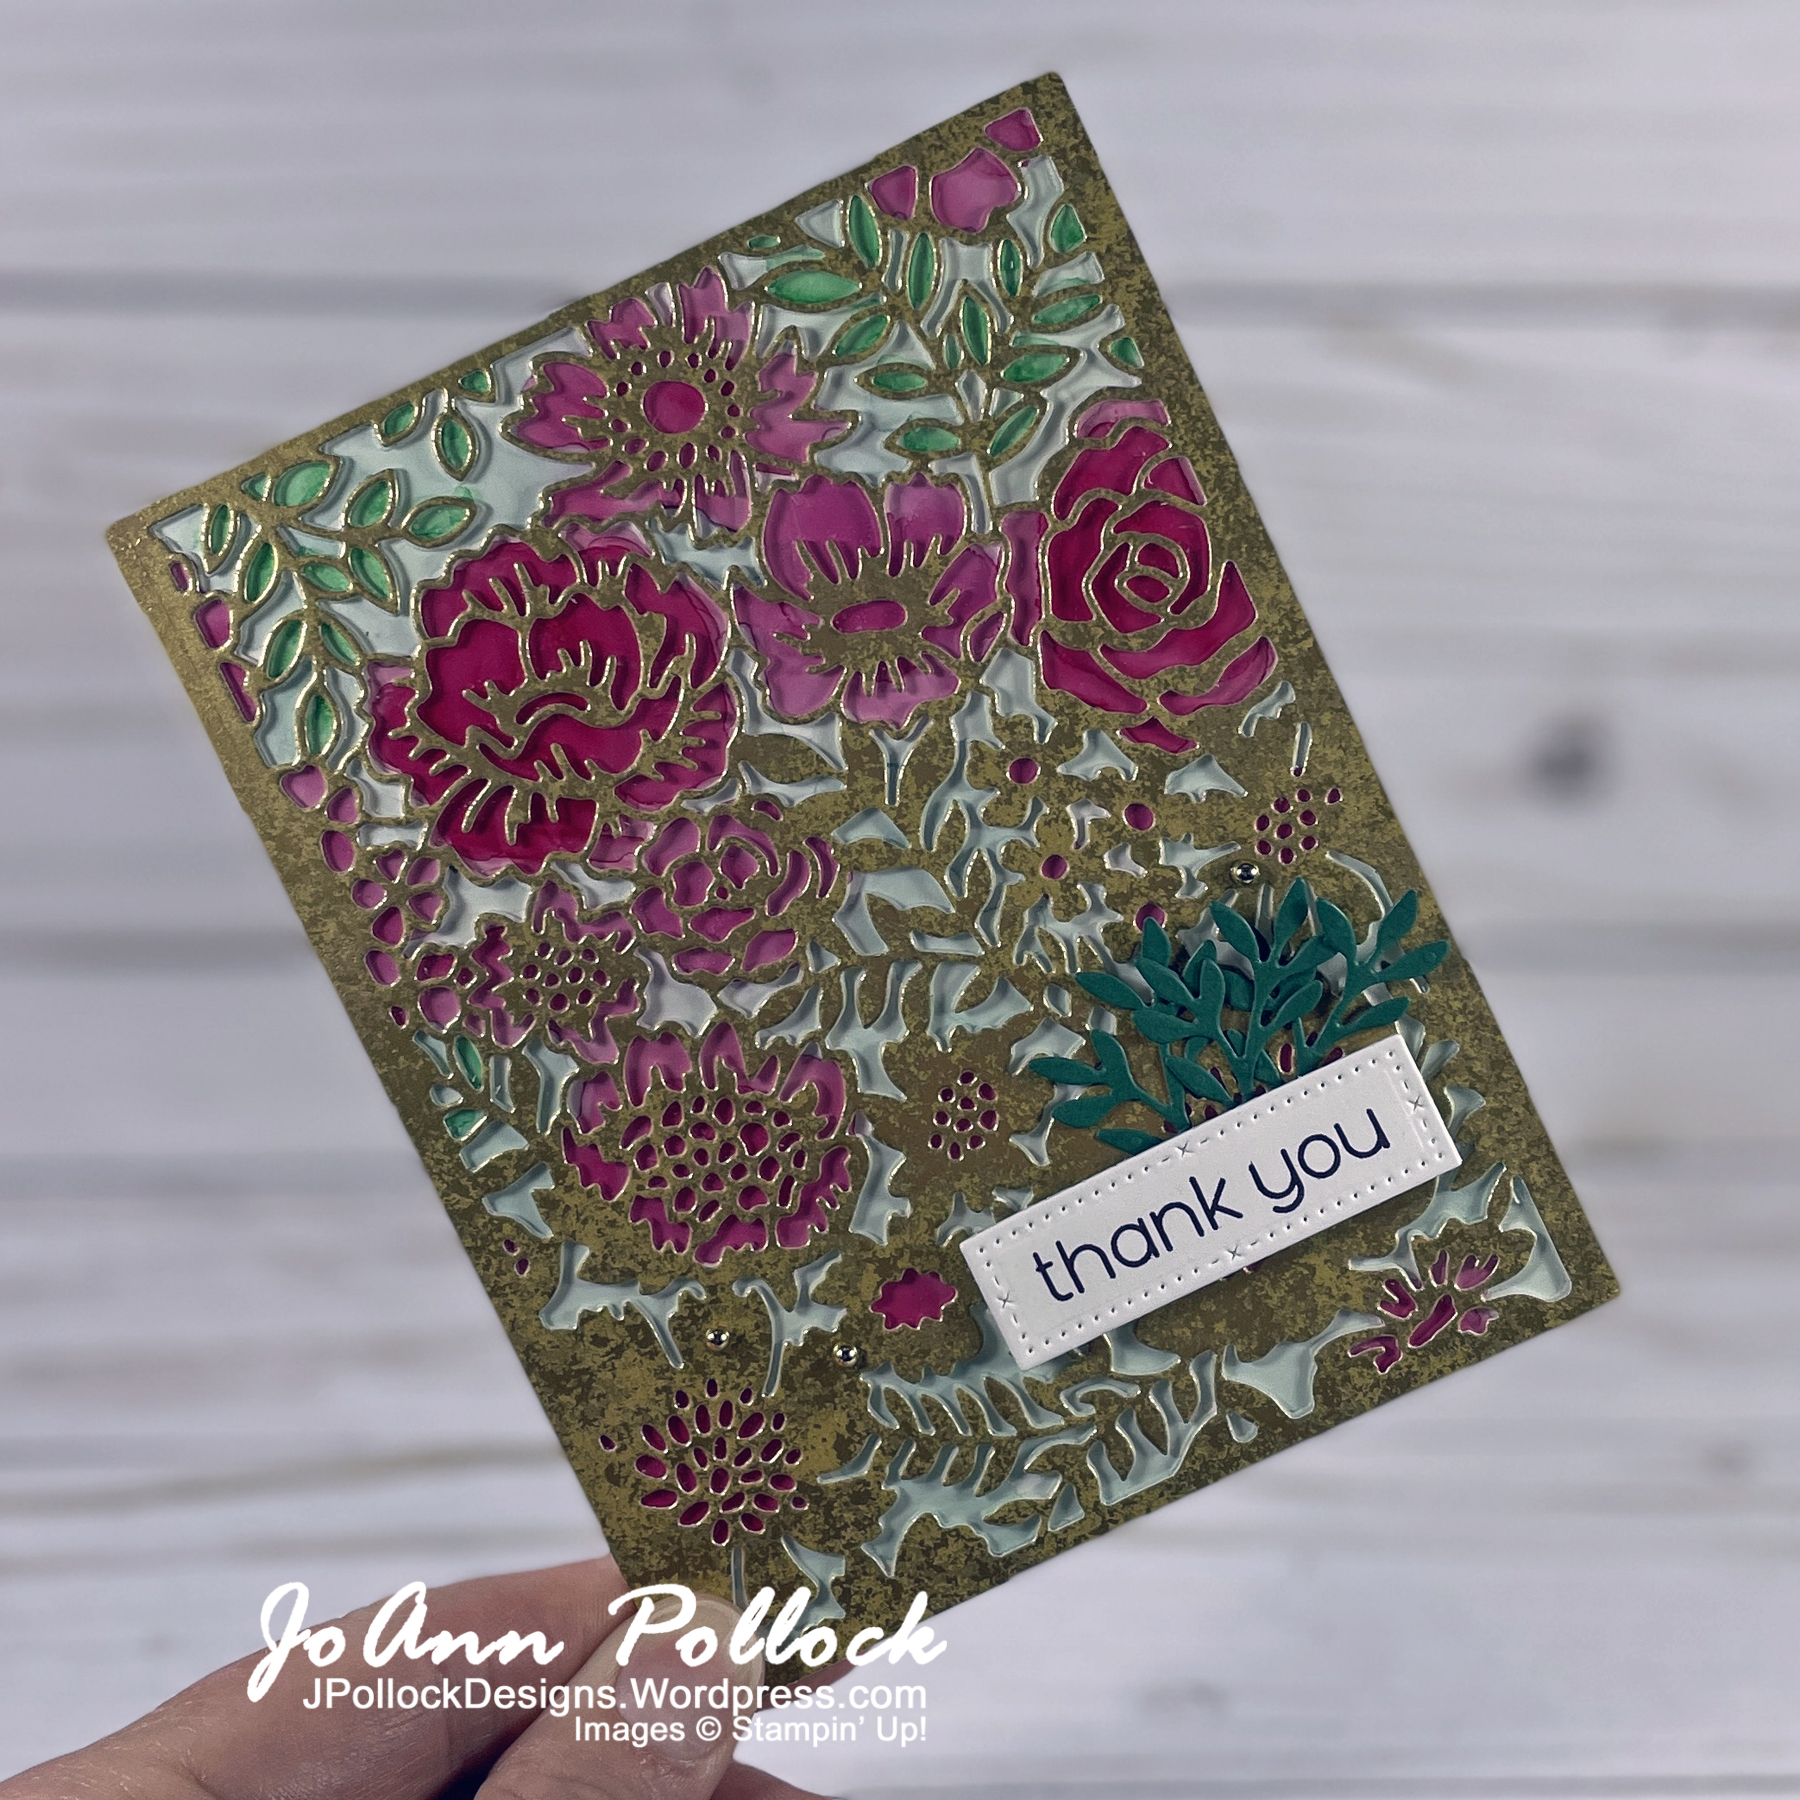
Welcome to the March Technique Squad Blog Hop! This month’s theme is the Stained Glass technique, which can be done using a variety of methods. For my project, I chose to use a window sheet and a background die.
To start, I added an adhesive sheet to the back of my 4 1/4″ x 5 1/2″ piece of Distressed Gold paper. Then, I used the background die from Two-Tone Flora dies and ran it through multiple times to ensure all the fine details were cut through. Since I had already put the adhesive on before die cutting, adding it to a window sheet was easy.
I colored in the flowers and leaves on the BACK of the window sheet using Blackberry Bliss, & Shaded Spruce Spampin’ Blends alcohol markers and filled in the rest using Lost Lagoon. The flowers look darker and lighter depending on how often I colored the area with my marker. I added two basic white die cuts behind the window sheet to give the card a little dimension.
I added the panel to a thick white card base and used the Timeless Arrangement stamps and dies for the sentiment and die cuts.

Supplies:
Stamp Sets – Timeless Arrangements
Die Cutting & Embossing – Timeless Arrangement & Two-Tone Flora dies
Ink – Blackberry Bliss stamp pad
Paper – Distressed Gold Specialty Paper; Window Sheets; Basic White Thick & Shaded Spruce cardstock
Accents & Embellishments – Festive Pearls
Coloring Tools – Blackberry Biss, Lost Lagoon, & Shaded Spruce Stampin’ Blends
Tools – Paper Trimmer, Simply Scored, Bone Folder, Stampin’ Cut & Emboss Machine, Take Your Pick
Adhesive – Adhesive Sheets, Stampin’ Dimensionals, liquid glue
Click here for links.


#stampinup #cardmaking #jpollockdesigns #handmadecards #handmadecard #GDPwinner #TimelessArrangementsStampinUp #TimelessArrangementsStampSet #TimelessArrangements #TwoToneFloraStampinUp #TwoToneFloraStampSet #TwoToneFlora


I love the gold for the top layer. Very pretty card.
LikeLiked by 1 person
thank you
LikeLike
Absolutely gorgeous!
LikeLiked by 1 person
thank you
LikeLiked by 1 person